


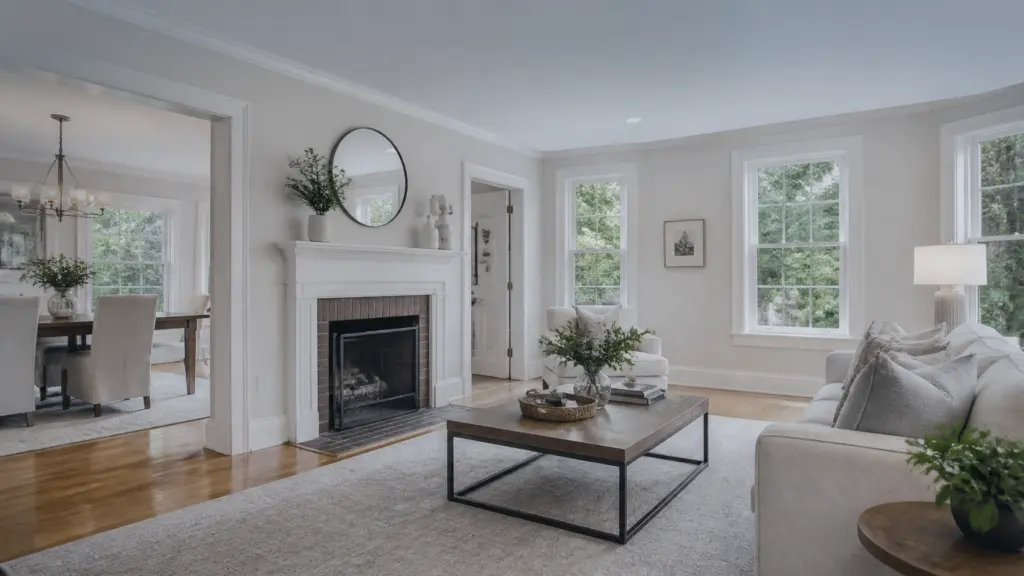
If you are preparing to sell and wondering how to sell my house in Melrose MA for the strongest possible price, start with the way buyers experience the property. Before they schedule a showing, they usually see your home online. When they arrive, they need to understand the layout, recognize the home’s best features, and picture themselves living there.
Melrose remains a competitive market in 2026. A current working snapshot shows homes selling for approximately 106% of the list price, with about 1.1 months of inventory. The median list price is around $750,000, up approximately 7.8% year over year, while mortgage rates are near 6.65%. Exact figures vary by property type, neighborhood, and reporting period, but the overall message is clear: buyers are paying close attention to well-prepared homes.
Staging does not mean hiding your home’s character or making unnecessary renovations. It means presenting the property so buyers can evaluate it easily. Use these 10 updates before listing.
1. Declutter every room
Start by removing items that make rooms feel smaller or distract from the home’s features. Buyers need to see the floors, windows, storage areas, and walking paths.
Work one room at a time. Pack away excess books, decorations, toys, seasonal items, and duplicate kitchen equipment. Remove furniture that blocks doorways or makes a room difficult to navigate. Store packed boxes away from the main living areas if possible.
Pay special attention to:
- Entryways and stair landings
- Kitchen counters and pantry shelves
- Bathroom vanities and linen storage
- Closets, basements, and garages
- Home offices and children’s rooms
Decluttering is not only a cleaning task. It helps buyers understand the size and function of each space. Before listing, walk through the house as if you were seeing it for the first time and remove anything that interrupts the visual flow.
2. Neutralize distracting paint colors
You do not need to repaint every room. Focus on colors that are highly personal, unusually dark, visibly worn, or difficult to coordinate with furniture.
Warm whites, soft grays, muted beige, and other light neutral tones typically photograph well and give buyers more flexibility. A neutral room also allows architectural details: such as original trim, hardwood floors, fireplaces, or built-ins: to receive more attention.
If you are unsure whether a room needs paint, check it in both daylight and evening light. Look for scuffs, patch marks, uneven touch-ups, and areas where the current color makes the room appear darker. Ask your real estate team to identify the rooms where paint may create the greatest improvement before you spend money.
3. Improve curb appeal
The exterior creates the first physical impression of your property. In Melrose, mature landscaping, traditional architecture, and neighborhood streetscapes are important features. Make the approach to your home look clean, maintained, and easy to access.
Complete these tasks before listing:
- Mow and edge the lawn
- Trim shrubs away from walkways and windows
- Remove weeds, leaves, and branches
- Wash the front steps, porch, and siding where appropriate
- Clean the front door and polish or replace worn hardware
- Add simple planters or seasonal flowers
- Confirm that exterior lights work
- Put away hoses, toys, bins, and garden tools
Do not over-landscape or add expensive improvements without checking the likely return. Your goal is a cared-for appearance that makes buyers comfortable before they enter.


4. Arrange professional photography before the listing goes live
Professional photography is one of the highest-impact staging decisions because your listing photos often provide the buyer’s first showing. A staged home can look less appealing if the photos are dark, poorly framed, or crowded.
Prepare each room before the photographer arrives. Open curtains and blinds, turn on lamps, remove small appliances from counters, and clear personal items from visible surfaces. Your agent and photographer can help determine which furniture should remain and which pieces should be moved temporarily.
Use photography to show:
- The best exterior view
- Main living spaces
- Kitchen and bathrooms
- Primary bedroom
- Important upgrades
- Natural light and usable outdoor areas
You may also want floor plans, a virtual tour, or carefully selected detail photos. These tools help online buyers understand the property before deciding whether to schedule an in-person visit.
5. Add and correct lighting
A bright home generally feels more welcoming and easier to evaluate. Check every light source before your first showing and before photography.
Replace burned-out bulbs and use consistent color temperatures where possible. Clean dusty fixtures, open window coverings, and remove heavy curtains that block natural light. If a room has only one overhead fixture, consider adding a floor lamp or table lamp.
Use lighting to address specific problems:
- Add a lamp to a dark corner
- Use under-cabinet lighting in the kitchen
- Replace outdated or damaged shades
- Clean windows and screens
- Turn on exterior and entry lights for evening appointments
Do not rely on bright bulbs alone. A balanced combination of daylight, overhead lighting, and lamps usually produces a more comfortable result.
6. Arrange furniture to show function and space
Furniture should help buyers understand how they can use each room. It should not prevent them from moving through the property.
Create clear walking paths between doors, windows, and major features. Float furniture away from walls when the room allows it, and avoid placing oversized pieces in smaller rooms. In the living room, arrange seating to show conversation and create a clear view of the fireplace, windows, or built-in shelving.
If a room has an uncertain purpose, give it one. A small room might work best as an office, reading area, or guest room. Remove furniture that makes a bedroom appear too small, and use appropriately sized pieces throughout the home.
Ask your agent to review the arrangement before the photographer arrives. A small adjustment can make a meaningful difference in both photographs and showings.
7. Focus on the kitchen
The kitchen often receives close attention from buyers, but you do not necessarily need a full remodel. Concentrate on cleanliness, condition, and presentation.
Clear most items from the countertops. Keep only a few intentional accessories, such as a cutting board, a bowl of fresh fruit, or a simple plant. Remove magnets, notes, and children’s artwork from the refrigerator. Clean cabinet fronts, backsplashes, appliances, and floors.
Consider modest updates when they are needed:
- Replace worn cabinet pulls
- Repair loose hinges and handles
- Re-caulk visibly damaged areas
- Touch up chipped paint
- Replace outdated or broken light fixtures
- Organize cabinets so storage is easy to see
Buyers in a higher-rate environment may be especially attentive to overall value. A clean, functional kitchen helps them focus on the home’s possibilities instead of creating a repair list.

8. Refresh the bathrooms
Bathrooms should feel clean, maintained, and simple. Remove excess toiletries, bathmats, cleaning products, and personal items from view. Store daily-use items in a cabinet or container before each showing.
Inspect the details buyers notice quickly:
- Dripping faucets
- Loose towel bars
- Cracked caulk
- Cloudy mirrors
- Stained grout
- Slow drains
- Burned-out bulbs
- Damaged toilet seats or hardware
Fresh towels, a clean shower curtain, and a small neutral accessory can improve presentation without a major expense. If the bathroom needs more substantial work, ask for a staging and pricing opinion before beginning a renovation.
9. Complete small repairs
Minor defects can suggest that larger maintenance issues have been overlooked. Make a written repair list and address the items that buyers are most likely to notice or include in an inspection report.
Examples include:
- Sticking doors
- Loose railings
- Damaged screens
- Missing outlet covers
- Squeaky or uneven doors
- Peeling paint
- Loose cabinet doors
- Broken blinds
- Leaking fixtures
- Worn weatherstripping
You do not need to repair every imperfection immediately. Prioritize visible, inexpensive items and anything that affects safety, function, or water intrusion. Keep receipts and contractor information for completed work so you can provide accurate details later.
For broader preparation guidance, review The Bill Butler Group’s Prepare to Sell checklist.
10. Prepare for online first impressions
Before the listing is published, review the property through a buyer’s screen. Look at the photos in sequence and ask whether they communicate a clear, attractive story.
The first image should create interest without exaggerating the property. The following photos should show how the rooms connect and highlight the home’s most valuable features. Remove clutter, reflections, open toilet lids, visible trash containers, and anything that makes the home appear unfinished.
Also check the listing information for accuracy. Confirm room names, square footage, improvements, heating and cooling details, parking, outdoor features, and any included items. Buyers who find conflicting or incomplete information may move on to another property.
The National Association of REALTORS® reports that 83% of buyers’ agents say staging helps buyers visualize a property as their future home. Review the NAR Profile of Home Staging for additional background. Staging supports that visualization, while accurate photography and listing details help serious buyers decide whether to take the next step.
Should you stage every room?
Usually, you should stage the rooms that influence how buyers understand the home. The living room, primary bedroom, kitchen, entryway, and outdoor areas often deserve priority. If your budget is limited, use decluttering, cleaning, furniture rearrangement, and targeted updates before paying for additional furnishings.
Your preparation plan should reflect your property’s condition, location, likely buyer, and expected listing price. A condo near downtown Melrose may need a different presentation from a larger single-family home near the Fells or a property with an extensive yard.
Make a practical staging plan before listing
Start by walking through the property with a local real estate professional. Ask for a written list divided into three categories:
- Complete now: cleaning, decluttering, safety items, and basic repairs.
- Consider before photography: paint, furniture changes, lighting, and targeted updates.
- Do only if justified: larger renovations or paid staging services.
The Bill Butler Group can help you evaluate these choices as part of the seller preparation process and review current conditions in Melrose. You can also compare the local market with current Melrose properties.
A well-staged home does not guarantee a specific result, but it can make the property easier to understand, more appealing online, and more comfortable to visit. Complete the highest-impact updates first, verify the details, and make sure your home is ready before the first buyer sees it.
